Pie Buttons – Pie Art / Pie Decorating
Posted by The Pie Guy
Ideas on decorating your pie – pie art.
Pie buttons are an easy way to decorate and personalize your pie.
Anyone can do it!
Decorating a wedding pie?
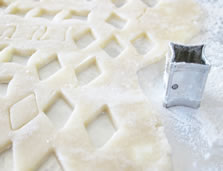
[sc:clearboth]Pie Buttons are Pie Crust Cutouts
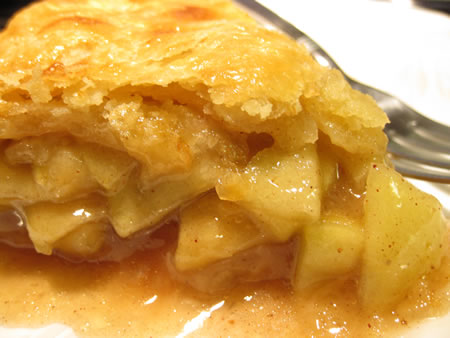
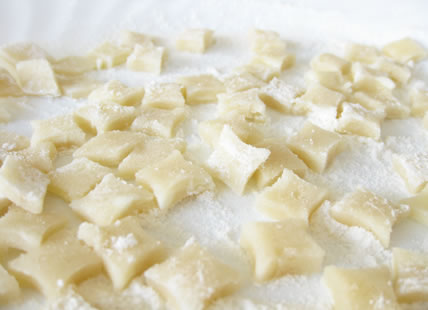
Pie buttons are small cutout pieces of pie crust dough that get applied to the top of your pie crust.
[sc:ADtop]
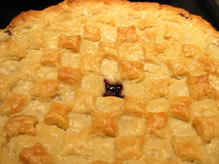
These pie buttons can be arranged to any pattern you want. Or you can use them to make a statement or build letters.
These pie buttons were arranged to create a checker board pattern.
Equipment:
Flour – for dusting
A bag of ice – to keep the working surface cold
Chilled rolling pin
Candy cutters or mini cookie cutters
Chilled pie crust dough.
Heavy cream
Small brush
1. Chill your flat work surface with the bag of ice for 15 minutes or more.
2. Remove the ice bag and dry the surface with a towel if wet.
3. Dust the surface with some flour.
4. Roll out your dough to 1/4 to 3/8 inch thick. Dust the top with flour too if it starts to stick to the rolling pin.
5. Dip your candy cutter into some flour. This will prevent your pie buttons getting stuck in the cutter.
6. Slowly push the cutter into the rolled out dough. Apply it evenly and squarely with the surface.
[sc:clearboth]7. Remove the cutter and push out your pie button. Store your cutout pie buttons on a chilled plate.
8. Repeat steps 5 through 7 until you have enough pie buttons to complete your decorations.
9. Chill your pie buttons. Cover the plate with plastic wrap and chill for 15 minutes or more, up to three days if dough was freshly made.
10. Now for the fun part. Plan out the pattern first on paper using a circle to represent the top crust.
11. Start with your pie buttons that are in or near the center of the pie and work out to the perimeter (edges) of the pie.
12. Dip a small brush or Q-tip into the heavy cream.
13. Place a drop of the heavy cream on the pie crust where the button will go.
14. Now gently place a chilled pie button on top of the drop of cream. Give it a light push to get the pie button to adhere to the crust.
15. Repeat steps 12 through 14 until the pattern is complete. Work quickly but carefully.
16. Chill the whole pie again.
17. The pie is now ready for baking. You may brush on an egg wash if desired.
[sc:ADbottom]